PoE 2 Artillery Ballista Gemling Build (Dawn of the Hunt 0.2.0)
When I first booted up Path of Exile 2 early access, I wasn’t sure what to expect. Like many of you, I’ve been around since the early days of PoE 1, juggling trap builds, glass cannon bow characters, and the classic Flame Totem spam. But once I got my hands on the Gemling Artillery Ballista, everything just clicked. This wasn’t just another totem build. It felt different. More fluid. More powerful. More... fun.
So if you’re thinking about trying this setup, let me walk you through how I built my PoE 2 Artillery Ballista Gemling, what worked, what didn’t, and how it absolutely shredded everything I threw it at.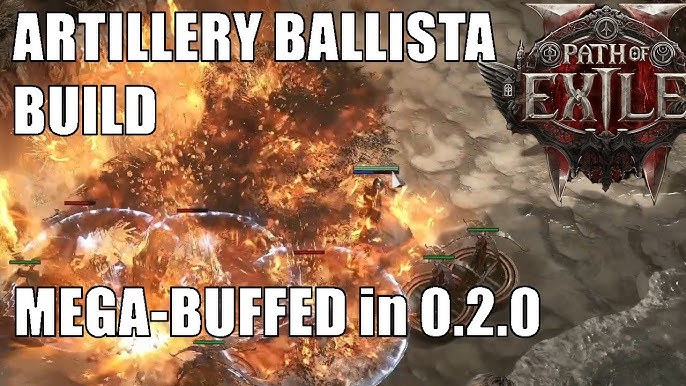
Why I Chose Artillery Ballista in PoE 2
I’ve always had a thing for turret-style gameplay—lay down your damage dealers and focus on positioning and strategy. It’s tactical, satisfying, and safe. So when I found out PoE 2 introduced Gemling skill variants, I was immediately intrigued.
The Gemling Artillery Ballista was the standout. It’s a long-range, fire-based ballista skill that calls in waves of flaming arrows like you’re commanding your own miniature war zone. The visual flair? Chef’s kiss. But beyond that, the raw power and range of this build made it a dream to play.
If you're like me and enjoy sitting back while your minions—or in this case, ballistas—do the dirty work, this is a must-try.
Getting Started with the Build
I kicked off this build using the Ranger Gemling, which naturally synergizes with projectile and fire damage. Early on, I leveled with a generic bow setup (Explosive Arrow was my placeholder) until I got access to the Gemling version of Artillery Ballista. Once I slotted that in? Game-changer.
The first time I dropped four totems and watched them rain fire from above, I knew I wasn’t going back. The new skill socket system in PoE 2 made it easy to stack support gems directly into the skill gem using orbs, and the automation felt buttery smooth.
Here’s the core of my setup once I got going:
-
Artillery Ballista (Gemling Version)
-
Multiple Totems
-
Fire Penetration
-
Increased Projectile Speed
-
Burning Damage
-
Area of Effect
-
Later on, I hit the jackpot with a Perfect Jeweller’s Orb, which let me socket an additional support. This orb is rare, so if you find one—save it for a key gem like this.
How It Plays in Real Combat
The best way I can describe the playstyle is: commander of the battlefield. I’d drop my totems from range, stay mobile, and let the ballistas light up the screen. This build doesn’t require you to stand in melee or worry about precise targeting—just pick the right angle, and let the rain of fire do the work.
The beauty here is that in PoE 2, totems aren’t as clunky as they used to be. I remember in PoE 1 how you’d be stuck placing one at a time, hoping they’d survive long enough to contribute. Now, they auto-place faster, and you can have several active depending on your gear and supports.
Bosses? Melted. Packs of mobs? Gone in seconds. It’s not the fastest mapper compared to movement-heavy builds, but it more than makes up for it in safety and style.
Gear I Used and What Worked Best
I’m not the kind of player who needs mirror-tier gear. I play on a budget, experiment a lot, and make things work with what I have. Here’s what I looked for and what really boosted the build:
Weapon (Bow)
-
-
Levels to Fire and Totem Gems were game changers.
-
-
Crafted a nice rare with PoE 2 Orbs—if you don’t have time to grind, I’d recommend checking out PVPBank for gear or orbs. They’ve been a reliable shortcut when I needed to save time.
Quiver
-
Increased projectile speed and fire damage helped a ton with clearing.
-
I snagged a unique early on, but even a rare with solid stats will do.
Armor
-
Totem placement speed on gloves felt like a minor upgrade, but it was noticeable.
-
Life and resists were my go-to for survivability. Don’t skimp on this—it’s easy to get greedy with DPS stats and end up paper-thin.
Rings and Amulet
-
Rings with fire damage to attacks, resistances, and life.
-
Amulet with Catalyst enhancements gave me some nice boosts to fire-based mods.
And don’t forget your flasks. A Quartz Flask for phasing saved me more times than I can count, and an Instant Life Flask is a must-have in PoE 2’s more punishing combat scenarios.
Navigating the Passive Skill Tree
I spent a good few hours theorycrafting on this one. In PoE 2, the passive skill tree feels both familiar and fresh. I focused on a few key areas:
-
Totem Clusters: Increased damage, totem count, and placement speed.
-
Fire Damage and Burning Nodes: These scaled the Artillery Ballista beautifully.
-
Projectile Speed and AoE: Helped with smoother clearing and more impact.
What really made a difference for me was branching out into life and resist clusters early. PoE 2’s mobs don’t play around, especially in later acts.
Leveling Journey and What I Learned
Leveling with this build felt smooth after the early bow phase. Once I slotted Artillery Ballista, the pacing really picked up. Here are a few tips based on my run:
-
Get your Multiple Totems support gem as soon as possible.
-
Don’t stress about perfect gear early—just keep upgrading regularly.
-
Keep your main skill gem socketed in gear with the highest number of support slots.
-
Always be crafting. Even with basic orbs, you can roll solid gear that keeps you ahead of the curve.
Oh, and pro tip: keep an eye out for Catalysts during Breaches. They helped me upgrade jewelry in subtle but impactful ways.
Endgame Thoughts and Boss Fights
This build truly shines in boss fights. Because your totems keep attacking while you dodge, you get constant uptime on damage. I cleared several bosses with minimal damage taken just by repositioning and letting my ballistas do their thing.
When it came to harder content—especially the new endgame content from Patch 0.2.0—I found myself tweaking my flasks and gem links a bit. Swapping out for more burning damage or AoE on specific encounters helped me push through tough zones.
If you’re aiming for full Atlas clears or trying out Breach farming, this build handles it all—just know your limits, stack defenses, and let your totems shine.
Final Thoughts
Playing this PoE 2 Artillery Ballista Gemling build reminded me why I fell in love with totem builds years ago—but this version feels so much more refined. If you’re into strategic play, explosive visuals, and high uptime boss damage, this one’s for you.
I’m still tweaking, theorycrafting, and pushing the build further, but so far? It’s been an absolute blast. Whether you're new to PoE 2 or a returning vet like me, give this a shot. It’s fresh, fun, and highly effective.
And if you need a boost—some extra orbs to roll your gear or even just get started faster—check out PVPBank. One quick trade can save you hours of grinding and let you focus on what matters: nuking everything in your path.